Posted on April 10, 2017 by Melissa Auxier
| 0 comments
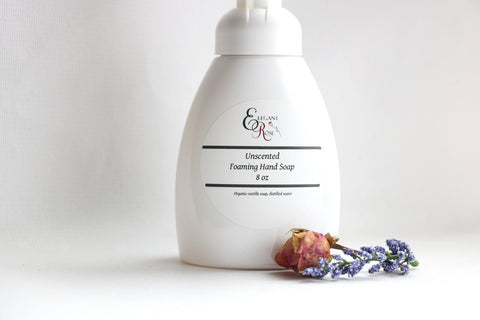
Years ago, I was having trouble with really dry hands, this was before my soap making days and I was just beginning my journey to a healthier way of living. I realized that the hand soap I was purchasing from the store was causing my dry hands and decided to search for a better way. It had to be easy as at the time I had many children under tow. So, here is what I found.
At first, I purchased foaming soap at the store and poured out the contents, not very frugal I realize, but the pain and discomfort it was causing me outweighed the loss of the discarded soap. So, with foaming bottle in hand, I poured in about 1/4 inch of an organic castille soap, like Dr. Bronners or Vermont Soap. Then fill the container slowly with water, if you fill too fast, you will just create a bottle of foam. You can leave it unscented or put 15-20 drops of your favorite essential oil or blend into the foaming bottle. Put the cap on and you're all set. This works like a charm and it's saved my hands and hundreds of dollars.
1 or 2 Foaming Soap Bottles
1/8 cup (approximately) of organic liquid castille soap per bottle
Water
15-20 drops of essential oil
If you prefer to purchase my hand soap or my DIY Foaming Hand Soap you can do so here https://elegant-rose-boutique.myshopify.com/admin/products/9217443784
Posted in
bath and beauty,
DIY,
DIY Foaming Hand Soap,
do it yourself hand soap,
elegant rose boutique,
elegant rose website,
essential oils
Posted on February 05, 2015 by Melissa Auxier
| 5 comments
DIY Shower Steamers:
Shower steamers are very similar to bath bombs but usually a different shape and typically, you need to use more essential oils than you would need for a bath bomb.
You can make your shower steamers in any mold that you would like, I use a muffin tin for mine. Then store them in a glass jar in the bathroom so that they are handy when you need them.
- 1 cup Baking Soda
- 1/4 cup Epsom Salt
- 1/2 cup citric acid
- 1/2 cup white clay or arrowroot powder or tapioca starch or corn starch, any of these will work.
- 2 and 3/4 tbsp carrier oil of your choice - almond oil, coconut oil, etc.
- 3/4 tbsp of water
- Essential oils: I recommend using 1 tablespoon of essential oils of your choice
- Combine baking soda, epsom salt, citric acid and clay, mix well until combined.
- Mix your water, carrier oil and essential oils
- Use a whisk and slowly pour the essential oil mix into the dry mix. Blend thoroughly. Mixture should hold together when squeezed without crumbling but should not be real wet feeling. If you get it too wet, it will begin to fizz.
- Push mix into your mold, don't pack tightly, but pack well. Depending on the mold used, I typically leave it in the mold for 15 minutes or so and then flip the mold carefully onto a cookie sheet to dry. Leave to dry 24 to 48 hours.
- When dry, remove and store in air tight container.
To use: Place one in the back of your shower out of the stream of water, so that it can dissolve slowly to maximize the aromatherapy benefit. I don't recommend using these in a bath unless you cut back on the essential oils used as it would be too strong. This batch makes 4-6 muffin tin shower steamers.
Shower steamers can be any combination of essential oils depending on the desired aromatherapy effect you are looking for.
Sinus blend might include peppermint, lavender, rosemary, camphor, menthol, eucalyptus.
Relaxing blend might include lavender, orange, tangerine, ylang ylang,
Energy blend might include any of the following - peppermint, ginger, spearmint, rosemary
Experiment with the oils you like or have on hand and let us know how it goes!
Posted in
aromatherapy,
bath bombs,
bath products,
cold flu relief,
DIY,
diy shower steamers,
Do it yourself,
essential oil bath bomb,
essential oil steamer,
handmade soap,
natural shower steamer,
natural sinus relief,
shower steamer,
shower tablets,
sinus congestion relief,
sinus problems